PHP是lnmp環(huán)境中必不可少的一個(gè)關(guān)鍵的東西了,我們不管是nginx,apache要執(zhí)行php都需要安裝php了,下面小編為各位介紹編譯源碼安裝PHP的方法,希望文章可以幫助到各位.
我們使用vagrant建立虛擬環(huán)境,這里使用"chef/centos-6.5"這個(gè)box,這個(gè)box是一個(gè)比較純凈的CentOS-6.5系統(tǒng),關(guān)于Vagrant如何使用,請參考Vagrant快速入門.
- $ vagrant init chef/centos-6.5
- $ vagrant up
執(zhí)行上述命令之后,就已經(jīng)建立了一個(gè)centos-6.5的虛擬機(jī)并且啟動(dòng)了,這時(shí)我們使用命令ssh連接到虛擬機(jī).
$ vagrant ssh
提示符變成了[vagrant@localhost ~]$,說明成功連接到了虛擬機(jī),接下來,我們就可以開始PHP開發(fā)環(huán)境的安裝配置了.
如果不使用vagrant,可以自己安裝一個(gè)CentOS系統(tǒng)或者是虛擬機(jī),以下步驟與vagrant沒有直接關(guān)系.
編譯源碼安裝PHP
首先,下載PHP安裝文件,我們使用源碼編譯安裝 PHP 5.4.35,到PHP官網(wǎng)下載PHP安裝文件.
- $ wget http://jp1.php.net/distributions/php-5.4.35.tar.gz
- $ tar -zxvf php-5.4.35.tar.gz
- $ cd php-5.4.35
接下來對PHP源碼進(jìn)行編譯安裝,進(jìn)入到源碼目錄之后,執(zhí)行下列命令安裝.
注意:如果需要mysql的話,最好是在變異的時(shí)候就提供參數(shù)并且指定為使用mysqlnd庫,否則單獨(dú)編譯 擴(kuò)展的形式安裝只能使用MySQL Client Library.
- $ ./configure --prefix=/usr/local/php --with-config-file-path=/usr/local/php/etc --with-iconv-dir --with-freetype-dir --with-jpeg-dir --with-png-dir --with-zlib --with-libxml-dir=/usr --enable-xml --disable-rpath --enable-bcmath --enable-shmop --enable-sysvsem --enable-inline-optimization --with-curl --with-curlwrappers --enable-mbregex --enable-fpm --enable-mbstring --with-mcrypt --enable-ftp --with-gd --enable-gd-native-ttf --with-openssl --with-mhash --enable-pcntl --enable-sockets --with-xmlrpc --enable-zip --enable-soap --with-gettext --with-mysql=mysqlnd --with-mysqli=mysqlnd --with-pdo-mysql=mysqlnd
執(zhí)行上述命令之后,提示如下錯(cuò)誤:
configure: error: no acceptable C compiler found in $PATH
這是因?yàn)闆]有安裝gcc編譯器,我們需要先安裝gcc.
$ sudo yum install gcc
安裝之后,重新編譯,這次出現(xiàn)了新的錯(cuò)誤:
configure: error: xml2-config not found. Please check your libxml2 installation.
提示找不到libxml2,沒問題,安裝一下就行了.
$ sudo yum install libxml2-devel
繼續(xù)重新編譯,編譯安裝的過程就是不斷解決問題的過程,每次遇到問題,我們?nèi)ソ鉀Q問題,沒有什么是能難道我們的.
configure: error: Cannot find OpenSSL's <evp.h>
因?yàn)槲覀儐⒂昧?-with-openssl,因此,我們需要安裝openssl-devel.
$ sudo yum install openssl-devel
再次編譯,提示:
- configure: error: Please reinstall the libcurl distribution -
- easy.h should be in <curl-dir>/include/curl/
錯(cuò)誤已經(jīng)說明了,安裝一下libcurl.
$ sudo yum install libcurl-devel
繼續(xù)編譯,我們還會(huì)遇到如下錯(cuò)誤:
configure: error:jpeglib.h not found.
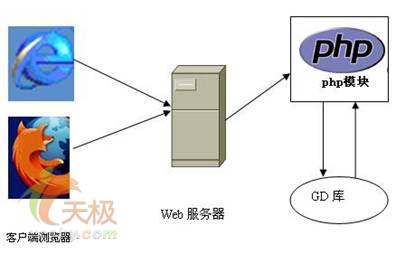
因?yàn)槲覀兊木幾g參數(shù)中提供了對GD庫的支持,因此需要安裝以下幾個(gè)庫.
- $ sudo yum install libjpeg libjpeg-devel
- $ sudo yum install libpng libpng-devel
- $ sudo yum install freetype freetype-devel
安裝了這么多l(xiāng)ib,總該成功了吧,再次編譯,悲劇的是,又報(bào)錯(cuò)了:
configure: error: mcrypt.h not found. Please reinstall libmcrypt.
我們還需要安裝libmcrypt,這個(gè)lib在yum中是沒有的,因此需要下載下來,手動(dòng)編譯.
- $ wget ftp://mcrypt.hellug.gr/pub/crypto/mcrypt/libmcrypt/libmcrypt-2.5.7.tar.gz
- $ tar -zxvf libmcrypt-2.5.7.tar.gz
- $ cd libmcrypt-2.5.7
- $ ./configure
- $ make
- $ sudo make install
好了,我們再編譯一次,這次一定要成功了,再不成功就不玩了,幸運(yùn)的是,這次configure成功,一鼓作氣,編譯安裝:
- $ make
- $ sudo make install
一切都順利的話,我們已經(jīng)成功編譯并且安裝了PHP,安裝目錄在/usr/local/php,最后,我們需要提供php的配置文件php.ini.
- $ sudo cp php.ini-development /usr/local/php/etc/php.ini
- $ sudo mv /usr/local/php/etc/php-fpm.conf.default /usr/local/php/etc/php-fpm.conf
PHP的安裝目錄由configure的--prefix=目錄參數(shù)指定,另外,這里我們搭建的是用于開發(fā)的環(huán)境,如果需要作為生產(chǎn)環(huán)境,則需要注意一些安全性問題,同時(shí),建議不要拷貝php.ini-development文件了,而是拷貝php.ini-production文件.
查看一下PHP的版本:
- $ /usr/local/php/bin/php --version
- PHP 5.4.35 (cli) (built: Nov 25 2014 08:23:11)
- Copyright (c) 1997-2014 The PHP Group
- Zend Engine v2.4.0, Copyright (c) 1998-2014 Zend Technologies
為了操作方便,可以將php的bin目錄添加到環(huán)境變量,編輯~/.bash_profile,在export PATH上面添加下面一行內(nèi)容:
PATH=$PATH:/usr/local/php/bin
然后執(zhí)行如下命令:
$ source ~/.bash_profile
這樣,我們就可以直接使用命令,而不需要添加目錄了.
小技巧:如何查看PHP使用的是哪個(gè)配置文件?
- $ strace -e open php 2>&1 |grep php.ini
- open("/usr/local/php/bin/php.ini", O_RDONLY) = -1 ENOENT (No such file or directory)
- open("/usr/local/php/etc/php.ini", O_RDONLY) = 3
如果沒有安裝strace命令,使用yum install strace 安裝即可.
安裝擴(kuò)展
安裝完成基本的PHP了,接下來我們需要安裝一些符合業(yè)務(wù)需要的擴(kuò)展,安裝yaf開發(fā)框架擴(kuò)展,執(zhí)行以下命令,使用pecl進(jìn)行安裝:
$ sudo /usr/local/php/bin/pecl install yaf
不出意外的話,上述命令足以完成yaf的安裝,接下來,需要在php.ini文件中啟用yaf擴(kuò)展,編輯/usr/local/php/etc/php.ini,加入以下內(nèi)容.
extension=yaf.so
安裝mysql和mysqli擴(kuò)展
安裝mysql相關(guān)擴(kuò)展,推薦使用mysqlnd庫,但是找了半天,實(shí)在是沒有找到好的辦法單獨(dú)編譯mysql擴(kuò)展使用 mysqlnd庫,最后在文檔中看到下面這段內(nèi)容:
- The MySQL database extensions must be configured to use the MySQL Client Library. In order to use the MySQL Native Driver, PHP needs to be built specifying that the MySQL database extensions are compiled with MySQL Native Driver support. This is done through configuration options prior to building the PHP source code.
這里說的是如果安裝mysql擴(kuò)展的話,只能使用MySQL Client Library,百度/谷歌有好多安裝教程,如果希望使用mysqlnd庫的話,只能在編譯PHP的時(shí)候指定,因此,好像是只能重新編譯PHP了,如果你有好的辦法,可以交流交流.
安裝eAccelerator擴(kuò)展
- $ wget https://github.com/eaccelerator/eaccelerator/archive/master.zip -O eaccelerator.zip
- $ sudo yum install unzip
- $ unzip eaccelerator.zip
- $ cd eaccelerator-master/
- $ phpize
- $ ./configure --enable-shared
- $ make
- $ sudo make install
在php.ini中增加eAccelerator的配置信息:
- zend_extension="/usr/local/php/lib/php/extensions/no-debug-non-zts-20100525/eaccelerator.so"
- eaccelerator.shm_size="16"
- eaccelerator.cache_dir="/tmp/eaccelerator"
- eaccelerator.enable="1"
- eaccelerator.optimizer="1"
- eaccelerator.check_mtime="1"
- eaccelerator.debug="0"
- eaccelerator.filter=""
- eaccelerator.shm_ttl="0"
- eaccelerator.shm_prune_period="0"
- eaccelerator.shm_only="0"
執(zhí)行php -v可以看到:
- $ php -v
- PHP 5.4.35 (cli) (built: Nov 25 2014 10:40:18)
- Copyright (c) 1997-2014 The PHP Group
- Zend Engine v2.4.0, Copyright (c) 1998-2014 Zend Technologies
- with eAccelerator v1.0-dev, Copyright (c) 2004-2012 eAccelerator, by eAccelerator
安裝Xdebug擴(kuò)展:
- $ wget http://github.com/xdebug/xdebug/archive/master.zip -O xdebug.zip
- $ unzip xdebug.zip
- $ cd xdebug-master
- $ /usr/local/php/bin/phpize
- $ ./configure --enable-xdebug
- $ make
- $ sudo make install
接下來配置php.ini,加入該擴(kuò)展:
- zend_extension="/usr/local/php/lib/php/extensions/no-debug-non-zts-20100525/xdebug.so"
- xdebug.remote_enable=1
- xdebug.remote_host=localhost
- xdebug.remote_port=9000
- xdebug.remote_connect_back=1
- ;xdebug.remote_autostart=1
安裝OpCache擴(kuò)展:因?yàn)閑Accelerator已經(jīng)沒人維護(hù)好長時(shí)間了,所以,可以考慮使用OpCache.
- $ wget http://pecl.php.net/get/zendopcache-7.0.3.tgz
- $ tar -zxvf zendopcache-7.0.3.tgz
- $ cd zendopcache-7.0.3
- $ phpize
- $ make
- $ sudo make install
接下來需要配置php.ini,啟用該擴(kuò)展.
注意:如果與XDebug一起使用的話,需要確保OpCache在Xdebug之前加載.
- zend_extension="/usr/local/php/lib/php/extensions/no-debug-non-zts-20100525/opcache.so"
- opcache.memory_consumption=128
- opcache.interned_strings_buffer=8
- opcache.max_accelerated_files=4000
- opcache.revalidate_freq=60
- opcache.fast_shutdown=1
- opcache.enable_cli=1
新聞熱點(diǎn)


疑難解答
圖片精選