注:以下所有操作都在CentOS 6.5 x86_64位系統下完成。
#準備工作#
在安裝MySQL之前,請確保已經使用yum安裝了以下各類基礎組件(如果系統已自帶,還可以考慮yum update下基礎組件):
| gcccmakeopenssl+openssl-develpcre+pcre-develbzip2+bzip2-devellibcurl+curl+curl-devellibjpeg+libjpeg-devellibpng+libpng-develfreetype+freetype-develphp-mcrypt+libmcrypt+libmcrypt-devellibxslt+libxslt-develgmp+gmp-devellibxml2+libxml2-develmhashncurses+ncurses-develxml2 |
然后創建mysql的用戶組和用戶,并且不允許登錄權限:
| # id mysqlid: mysql:無此用戶# groupadd mysql# useradd -g mysql -s /sbin/nologin mysql# id mysqluid=500(mysql) gid=500(mysql) 組=500(mysql) |
#MySQL的安裝#
給MySQL的安裝準備目錄:
| # mkdir -p /data/mysql/data# chown -R mysql:mysql /data/mysql |
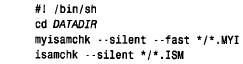
開始源碼安裝MySQL:
| # cd /usr/local/src# wget http://dev.mysql.com/get/Downloads/MySQL-5.6/mysql-5.6.10.tar.gz# tar zxf mysql-5.6.10.tar.gz# cd mysql-5.6.10# cmake -DCMAKE_INSTALL_PREFIX=/usr/local/mysql-5.6.10 -DSYSCONFDIR=/usr/local/mysql-5.6.10/etc -DMYSQL_UNIX_ADDR=/usr/local/mysql-5.6.10/tmp/mysql.sock -DMYSQL_TCP_PORT=3306 -DMYSQL_USER=mysql -DMYSQL_DATADIR=/data/mysql/data -DDEFAULT_CHARSET=utf8 -DDEFAULT_COLLATION=utf8_general_ci -DWITH_MYISAM_STORAGE_ENGINE=1 -DWITH_INNOBASE_STORAGE_ENGINE=1 -DWITH_ARCHIVE_STORAGE_ENGINE=1 -DWITH_BLACKHOLE_STORAGE_ENGINE=1 -DENABLED_LOCAL_INFILE=1...CMake Warning:Manually-specified variables were not used by the project:MYSQL_USER-- Build files have been written to: /usr/local/src/mysql-5.6.10# make && make install# mkdir -p /usr/local/mysql-5.6.10/etc# mkdir -p /usr/local/mysql-5.6.10/tmp# ln -s /usr/local/mysql-5.6.10/ /usr/local/mysql# chown -R mysql:mysql /usr/local/mysql-5.6.10# chown -R mysql:mysql /usr/local/mysql |
給當前環境添加MySQL的bin目錄:
| # vim /etc/profileexport MYSQL_HOME=/usr/local/mysqlexport PATH=$PATH:$MYSQL_HOME/bin$ source /etc/profile |
執行初初始化配置腳本并創建系統自帶的數據庫和表:
| # cd /usr/local/mysql# scripts/mysql_install_db --user=mysql --datadir=/data/mysql/data...OKTo start mysqld at boot time you have to copysupport-files/mysql.server to the right place for your systemPLEASE REMEMBER TO SET A PASSWORD FOR THE MySQL root USER !To do so, start the server, then issue the following commands:./bin/mysqladmin -u root password 'new-password'./bin/mysqladmin -u root -h iZ94mobdenkZ password 'new-password'Alternatively you can run:./bin/mysql_secure_installationwhich will also give you the option of removing the testdatabases and anonymous user created by default. This isstrongly recommended for production servers.See the manual for more instructions.You can start the MySQL daemon with:cd . ; ./bin/mysqld_safe &You can test the MySQL daemon with mysql-test-run.plcd mysql-test ; perl mysql-test-run.plPlease report any problems with the ./bin/mysqlbug script!The latest information about MySQL is available on the web athttp://www.mysql.comSupport MySQL by buying support/licenses at http://shop.mysql.comWARNING: Found existing config file ./my.cnf on the system.Because this file might be in use, it was not replaced,but was used in bootstrap (unless you used --defaults-file)and when you later start the server.The new default config file was created as ./my-new.cnf,please compare it with your file and take the changes you need.WARNING: Default config file /etc/my.cnf exists on the systemThis file will be read by default by the MySQL serverIf you do not want to use this, either remove it, or use the--defaults-file argument to mysqld_safe when starting the server |