1.Emiter 的制作
來吧!嘻嘻,只要幾分鐘時間嘍?
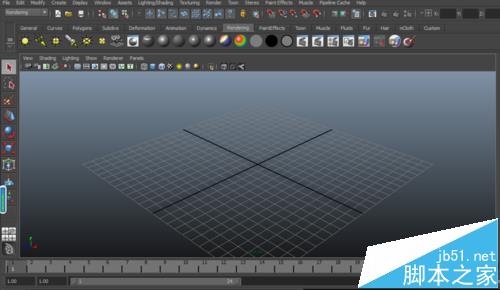
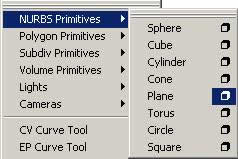
選擇 Create/NURBS Primitives/Plane, 見下圖,設置 U Patches 和 V Patches 都為 4, 其它的參數不變。
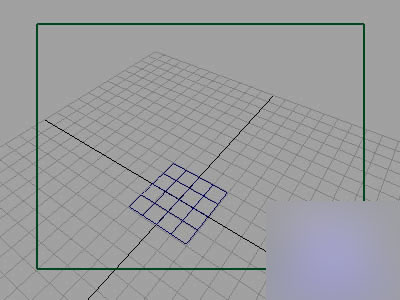
結果如下圖所示
現在為這個 Plane 加上粒子嘍,先按 F4 ,在選擇 Particles/Add Emitter, 如下圖所示

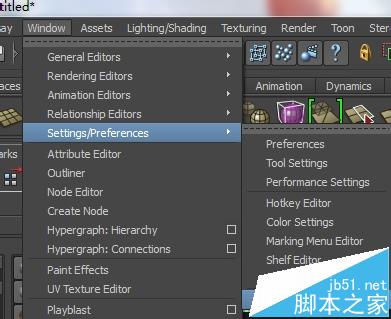
好了,現在利用 Window/outliner 打開,選擇 Emitter1 的屬性 ( 快捷方式是選擇物體,按 CRTL+A) ,把其 Rate(Particles/Sec) 設置為 100 左右 , 如下圖所示

2.Particle Attributes. 設置
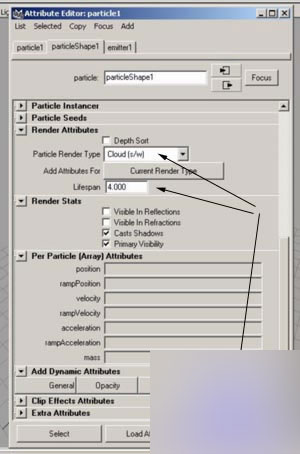
在 Outlinear 中選擇 Particles ,打開屬性,在 Render Attributes Type 中選擇 Could(s/w), 在 Add Dymamic Attributes 點擊 lifespan ,上面的設置 Render Attributes 中,設置 Lifespan 為 4 。如下圖所示 :
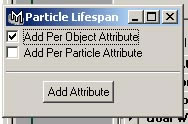
需要注意的是,在點擊 Lifespan 時,要選擇 Add Per Object Attribute ,如下圖所示
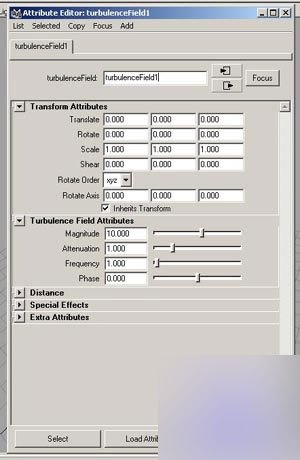
3.Turbulence
選擇 Particles 物體,選擇菜單 Fields/ Turbulence, 打開屬性編輯器,設置 Magnitude 為 10
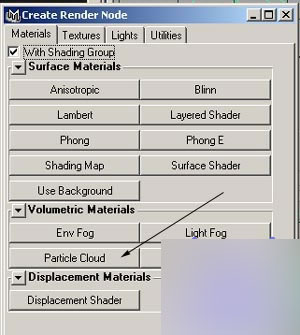
4. Particle Material.Cloud.(Multilister)
打開 Window/Rendering Editors/Multilister. 選擇 Edit-%26gt;Create, 在 Volumetric Materials 中選擇 Particle Cloud. 如下圖所示
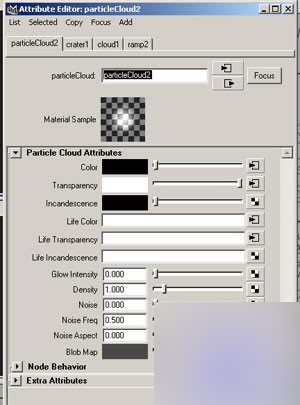
5. Particle Material. Color. Cloud.
打開 Particle Cloud 的屬性對話框,點擊 Color 右邊的 ![]() , 選擇材質為 3DTextures Cloud.
, 選擇材質為 3DTextures Cloud.
點擊 Transparency 右邊的 ![]() , 造擇材質為 2DTextures, Ramp.
, 造擇材質為 2DTextures, Ramp.
點擊 Blob Map 右邊的 ![]() , 選擇材質為 3DTextures Crater.
, 選擇材質為 3DTextures Crater.
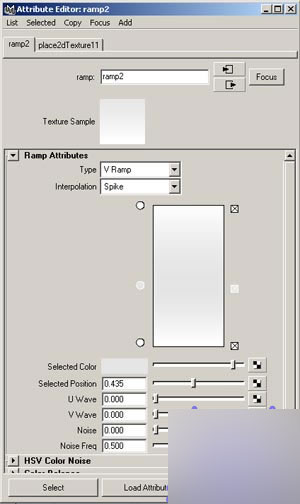
6. Particle Material. Transparency. Ramp.
開始設置 Transparency Ramp ,進入 Ramp 屬性設置框中
設置 Interpolation 為 Spike.
點擊 ![]() ( 頂 ) 色彩為白色 . ( 位置為 1).
( 頂 ) 色彩為白色 . ( 位置為 1).
點擊 ![]() ( 中間 ) 色彩為 0/0/0 .9/ 1( 位置為 0.435).
( 中間 ) 色彩為 0/0/0 .9/ 1( 位置為 0.435).
點擊 ![]() ( 底 ) 色彩為白色 . ( 位置為 0).
( 底 ) 色彩為白色 . ( 位置為 0).
7. Crater (Blob Map).
打開 Multilister ,在 Textures 中選擇 crater1 ,雙擊打開屬性,如下圖所示 :

在 Crater Attributes 中 , 設置 Channel1 為白色、 Channel2 為白色 . 、 Channel3 為黑色
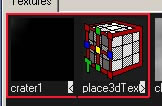
8. 3D Texture Node. Crater.
點擊如下圖所示的 crater1 右下角的 ![]() ,雙擊 Place 3d texture
,雙擊 Place 3d texture
下圖為 place3Dtexture 屬性圖,設置 Scale: 2,2,2.
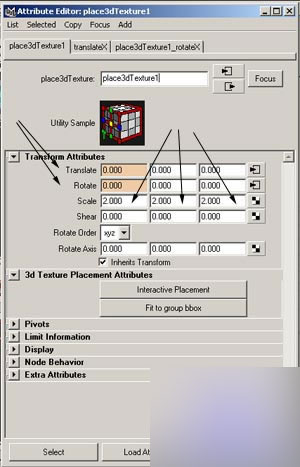
現在在這屬性中設置動畫,
設置 translateX 的動畫
設置時間為 1 時 , value 0.
設置時間為 25 時 , value 1.
設置 rotate X 的動畫
設置時間為 1, value 0.
設置時間為 25, value 15.
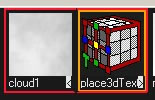
9. 3D Texture Node. Cloud
點擊 Multilister 工作區的 Texture/Cloud ![]() , 雙擊 Place3d ex, 如下圖所示
, 雙擊 Place3d ex, 如下圖所示
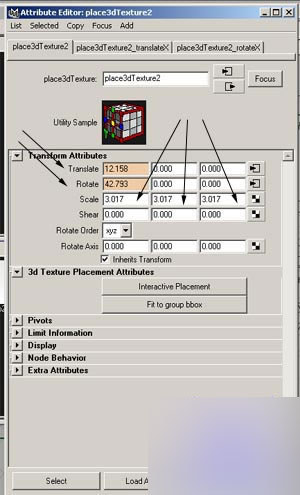
在 place3Dtexture2 中設置 scaleXYZ 各為 3,3,3. ,以及設置 translateX 動畫
在時間幀為 1 時 , 設置 translateX 為 0.
在時間幀為 20 時 , 設置 translateX 為 3.
在設置 rotate X 動畫:
在時間幀為 1 時 , 設置 rotate X 為 0.
在時間幀為 20 時 , 設置 rotate X 為 10.
10. 好了,我也介紹得差不多了,最后給這場景加一下 Directional light 以及渲染,嘻嘻,是不是很漂亮啦!來吧,只要你沒有累壞了,你就在做個模型吧,看看下面美麗的場景吧,你一定會心動的。
教程結束,以上就是MAYA 7.0 FX制作濃煙上升的效果過程,希望能對大家有所幫助!
新聞熱點


疑難解答