一、在 Anaconda2 中配置 OpenCV
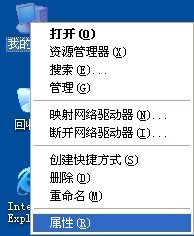
解壓 opencv,添加系統(tǒng)環(huán)境變量,計(jì)算機(jī)-->右鍵屬性-->高級(jí)系統(tǒng)設(shè)置-->環(huán)境變量-->系統(tǒng)變量-->編輯path-->添加 F:/Program Files (x86)/opencv-3.2.0-vc14/build/x64/vc14/bin
拷貝 opencv/build/python/2.7/x64/cv2.pyd 到 Anaconda2/Lib/Site-packages/
注意:從上面python/2.7可以看出,opencv 官方的 python 接口只支持 Anaconda2的版本 ,如果你裝的是 Anaconda3 的話,可以打開(kāi)cmd,然后執(zhí)行conda install -c https://conda.anaconda.org/menpo opencv3;
也可以參考此文章進(jìn)行 Anaconda3 的配置
打開(kāi) ipython 測(cè)試一下
import cv2print(cv2.__version__)
二、OpenCV 基礎(chǔ)知識(shí)
1. 讀取、顯示和寫入圖像
import cv2import matplotlib.pyplot as plt# 讀取圖像,第二個(gè)參數(shù)可以為1(默認(rèn)讀入彩圖, 可省略), 0(以灰度圖讀入)im = cv2.imread('empire.jpg', 1) # 函數(shù)imread()返回圖像為一個(gè)標(biāo)準(zhǔn)的 NumPy 數(shù)組h,w = im.shape[:2]print h,w# 顯示圖像,第一個(gè)參數(shù)是窗口的名字,其次才是我們的圖像,窗口會(huì)自動(dòng)調(diào)整為圖像大小。cv2.imshow('image', img)cv2.waitKey(0) # 為防止圖像一閃而過(guò),無(wú)限期的等待鍵盤輸入cv2.destroyAllWindows() # 關(guān)閉所有圖像# 保存圖像(必須設(shè)置保存圖像的路徑和擴(kuò)展名)cv2.imwrite('result.png', im)# 使用 plt 顯示圖像(可顯示像素坐標(biāo)及像素值)、保存圖像plt.imshow(im, cmap='gray', interpolation='bicubic')plt.show()plt.savefig('figpath.png', bbox_inches='tight')2. 顏色空間轉(zhuǎn)換
在OpenCV 中,圖像不是按傳統(tǒng)的RGB 顏色通道,而是按BGR 順序(即RGB 的倒序)存儲(chǔ)的。讀取圖像時(shí)默認(rèn)的是BGR,但是還有一些可用的轉(zhuǎn)換函數(shù)。顏色空間的轉(zhuǎn)換可以用函數(shù)cvtColor() 來(lái)實(shí)現(xiàn)。
# 1.使用opencv讀取并創(chuàng)建灰度圖像,按 BGR 順序im = cv2.imread('empire.jpg')gray = cv2.cvtColor(im, cv2.COLOR_BGR2GRAY)# 2.使用matplotlib.image 讀入并創(chuàng)建灰度圖像,按 RGB 順序import matplotlib.image as mpl_imgim = mpl_img.imread('empire.jpg')gray = cv2.cvtColor(im, cv2.COLOR_RGB2GRAY)# Note: 注意1和2的區(qū)別在顏色轉(zhuǎn)換代碼# 常用:cv2.COLOR_BGR2RGB、cv2.COLOR_GRAY2BGR、cv2.COLOR_BGR2HSV3. 在圖像上畫直線、矩形、圓、多邊形(曲線)
畫直線:cv2.line()
import cv2# 讀取圖像,按 BGR 順序img = cv2.imread('empire.jpg')# 傳入圖像、起點(diǎn)坐標(biāo)、終點(diǎn)坐標(biāo)、線的顏色(color)、線的厚度(thickness)# color : Color of the shape. for BGR, pass it as a tuple, eg: (255,0,0) for blue. For grayscale, just pass the scalar value.# thickness : if -1 is passed for closed figures like circles, it will fill the shape, default thickness = 1.img = cv2.line(img, (0, 0), (511, 511), (255, 0, 0), 5)畫矩形:cv2.rectangle()
# 需要傳入圖像、左上角頂點(diǎn)坐標(biāo)、右下角頂點(diǎn)坐標(biāo)、顏色、線寬img = cv2.rectangle(img, (384, 0), (510, 128), (0, 255, 0), 3)
畫圓:cv2.circle()
# 需要傳入圖像、圓的中心點(diǎn)坐標(biāo)、半徑、顏色、線寬img = cv2.circle(img, (447, 63), 63, (0, 0, 255), -1)# If -1 is passed for closed figures like circles, it will fill the shape. default thickness = 1
畫多邊形(包括曲線):cv2.polylines()
# 數(shù)組的數(shù)據(jù)類型必須為int32,若知道曲線方程,可以生成一堆點(diǎn),就可以畫出曲線來(lái)啦pts = np.array([[10,5],[20,30],[70,20],[50,10]], np.int32)# 第一個(gè)參數(shù)為-1, 表明這一維的長(zhǎng)度(點(diǎn)的數(shù)量)是根據(jù)后面的維度的計(jì)算出來(lái)的pts = pts.reshape((-1,1,2))# 如果第三個(gè)參數(shù)是False,我們得到的多邊形是不閉合的(首尾不相連)img = cv2.polylines(img, [pts], True, (0, 255, 255))
在圖片上添加文字:cv2.putText()
font = cv2.FONT_HERSHEY_SIMPLEX# 第 3~6 個(gè)參數(shù)為:bottom-left corner where data starts、font size、color、thicknesscv2.putText(img,'OpenCV',(10,500), font, 4, (255, 255, 255), 2, cv2.LINE_AA)
4. 圖像的基礎(chǔ)操作
獲取并修改像素值
import cv2import numpy as npimg = cv2.imread('messi5.jpg')px = img[100, 100]print px[57 63 68]# accessing only blue pixelblue = img[100, 100, 0]print blue57 # modify the pixelimg[100, 100] = [255, 255, 255]print img[100, 100][255 255 255]# channel 2 所有值置為0 img[:, :, 2] = 0獲取圖像屬性
img = cv2.imread('messi5.jpg')print img.shape(960L, 1280L, 3L)print img.size3686400print img.dtypeuint8選取圖像塊
img = cv2.imread('messi5.jpg')# select the ball and copy it to another regionball = img[280:340, 330:390] # 注意:340和390取不到img[273:333, 100:160] = ball以上這篇通過(guò)Python 接口使用OpenCV的方法就是小編分享給大家的全部?jī)?nèi)容了,希望能給大家一個(gè)參考,也希望大家多多支持VEVB武林網(wǎng)。
新聞熱點(diǎn)


疑難解答
圖片精選