目錄(?)[+]
http://www.jianshu.com/p/f797793d683fnavigationItem
UINavigationItem
UINavigationBar
UIBarButtonItem
UIButton
iOS 7 教程:定制iOS 7中的導航欄和狀態欄
本文試圖闡釋清楚導航欄相關的概念和用法,比如UINavigationBar和UINavigationItem的區別和聯系,UIBarButtonItem的用法以及在純代碼和storyboard中有什么不同。如果讀者有類似的疑惑,不妨讀一讀本文。
本文撰寫時,用的iOS8.3、Xcode6.3,因為沒有仔細考證iOS各版特性的不同,可能導致出入,若讀者遇到,還請指出,我及時改正。
 UINavigationBar繼承圖
文檔說明:
The UINavigationBar class PRovides a control for navigating hierarchical content. It’s a bar, typically displayed at the top of the screen, containing buttons for navigating within a hierarchy of screens. The primary properties are a left (back) button, a center title, and an optional right button. You can use a navigation bar as a standalone object or in conjunction with a navigation controller object.
翻譯:
UINavigationBar類提供一種對導航層級內容的控制。它是一個欄,最典型的用法就是放在屏幕頂端,包含著各級視圖的導航按鈕。它最首要的屬性是左按鈕(返回按鈕)、中心標題,還有可選的右按鈕。你可以單獨用導航欄,或者和導航控制器一起使用。
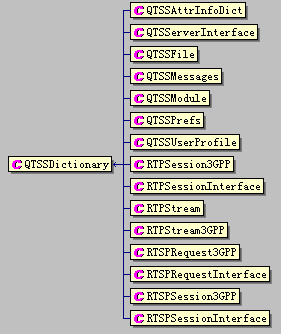
UINavigationItem繼承圖
文檔說明:
A UINavigationItem object manages the buttons and views to be displayed in a UINavigationBar object. When building a navigation interface, each view controller pushed onto the navigation stack must have a UINavigationItem object that contains the buttons and views it wants displayed in the navigation bar. The managing UINavigationController object uses the navigation items of the topmost two view controllers to populate the navigation bar with content.
翻譯:
一個UINavigationItem對象管理展示在導航欄上的按鈕和視圖。當創建一個導航界面的時候,每個壓入導航棧中的視圖控制器都需要一個navigation item,它包含了展示在導航欄上的按鈕和視圖。導航控制器利用最頂層的兩個視圖控制器的navigation item來提供導航欄的內容。
在純代碼操作UINavigationBar和UINavigationItem的實例中,我們會覺得不舒服,或者說疑惑的地方
疑惑
事實上,UINavigationController并沒有
self.navigationController.navigationItem.title = @"劉大帥";navigationItem這樣一個直接的屬性,由于UINavigationController繼承于UIViewController,而UIViewController是有navigationItem這個屬性的,所以才會出現如圖所示的情況,如果你這樣用:是沒有任何效果的。這當然是由于UINavigationController是個特殊的視圖控制器,它是視圖控制器的容器(另外兩個容器是UITabBarController和UISplitViewController),你不應該把它當一般的UIViewController來使用.
另外,讓人覺得不爽的地方如下:
self.navigationItem.title = @"劉大帥"; self.navigationController.navigationBar.barTintColor = [UIColor purpleColor];效果如下:
效果
這里讓人迷惑的地方在于,同樣是對導航欄的操作,怎么一個在第一層級(UIViewController),另外一個在其屬性navigationController的層級。
如前所說,
navigationItem是UIViewController的一個屬性,開發者文檔是這樣描述這個屬性的:This is a unique instance of UINavigationItem created to represent the view controller when it is pushed onto a navigation controller. The first time the property is accessed, the UINavigationItem object is created. Therefore, you should not access this property if you are not using a navigation controller to display the view controller. To ensure the navigation item is configured, you can either override this property and add code to create the bar button items when first accessed or create the items in your view controller'€?s initialization code.
Avoid tying the creation of bar button items in your navigation item to the creation of your view controller'€?s view. The navigation item of a view controller may be retrieved independently of the view controller'€?s view. For example, when pushing two view controllers onto a navigation stack, the topmost view controller becomes visible, but the other view controller'€?s navigation item may be retrieved in order to present its back button.
The default behavior is to create a navigation item that displays the view controller'€?s title.
翻譯一下:
它是UINavigationItem一個獨特的實例。當視圖控制器被推倒導航控制器中時,它來代表這個視圖控制器。當第一次訪問這個屬性的時候,它會被創建。因此,如果你并沒有用導航控制器來管理視圖控制器,那你不應該訪問這個屬性。為確保navigation item 已經配置,你可以在視圖控制器初始化時,重寫這個屬性、創建bar button item。
要避免在創建視圖控制器的視圖時,創建bar button item。視圖控制器的這個屬性——navigationItem,它的恢復(生命周期——作者注),可能獨立于視圖控制器的視圖。為什么會這樣?舉例來說,當把兩個視圖控制器壓到導航棧中,最頂層的視圖控制器是可見的,但另一個視圖控制器的navigation item 可能是活躍狀態(此時,隱藏的視圖控制器的視圖肯定是不活躍的,所以,這個時候navigation item 是獨立于視圖控制器的視圖的——作者注),因為它要呈現其返回按鈕。
缺省行為是創建一個navigation item 來展示視圖控制器的標題。
我們來總結一下,如果把導航控制器比作一個劇院,那導航欄就相當于舞臺,舞臺必然是屬于劇院的,所以,導航欄是導航控制器的一個屬性。視圖控制器(UIViewController)就相當于一個個劇團,而導航項(navigation item)就相當于每個劇團的負責人,負責與劇院的人接洽溝通。顯然,導航項應該是視圖控制器的一個屬性。雖然導航欄和導航項都在做與導航相關的事情,但是它們的從屬是不同的。
我想,這個類比應該能解決以上的疑惑吧。導航欄相當于負責劇院舞臺的布景配置,導航項則相當于協調每個在舞臺上表演的演員(bar button item,title 等等),每個視圖控制器的導航項可能都是不同的,可能一個右邊有一個選擇照片的bar button item,而另一個視圖控制器的右邊有兩個bar button item。
2、關于UINavigationItem一些測試
我們知道navigation item 有
leftBarButtonItems和rightBarButtonItems兩個屬性,每個屬性都可以賦值一個裝有UIBarButtonItem對象的數組,有沒有想過,如果數組裝有很多UIBarButtonItem對象,超過了導航欄展現的極限,會怎樣?如下圖:導航欄被撐爆...
代碼:
NSMutableArray* array = [NSMutableArray array]; for (int i =0; i<7; i++) { UIBarButtonItem* item = [[UIBarButtonItem alloc]initWithTitle:[NSString stringWithFormat:@"item%d",i+1] style:UIBarButtonItemStylePlain target:nil action:nil]; [array addObject:item]; } self.navigationItem.leftBarButtonItems = array; self.navigationItem.rightBarButtonItems = array;其實,這在開發文檔中已經說的很清楚了,拿
leftBarButtonItems來說:This array can contain 0 or more bar items to display on the left side of the navigation bar. Items can include fixed-width and flexible-width spaces. If the leftItemsSupplementBackButton property is YES, the items are displayed to the right of the back button, otherwise the items replace the back button and start at the left edge of the bar. Items are displayed left-to-right in the same order as they appear in the array.
If there is not enough room to display all of the items in the array, those that would overlap the title view (if present) or the buttons on the right side of the bar are not displayed.
The first item in the array can also be set using the leftBarButtonItem property.
前面說過,用代碼的時候,當你首次訪問視圖控制器中的navigation item的時候,它會自動創建,在storyboard中是怎樣的呢?
答案是,你需要給導航欄中的scene添加navigation item,如圖:
沒有添加navigation item 之前
添加navigation item 之后
storyboard中怎樣配置
leftBarButtonItems和rightBarButtonItems兩個屬性?我發現storyboard只支持左右各一個bar button item,當你拖拽一個新的bar button item到導航欄視圖給它增加一個時,它只會替換,可能,如果想多個,還得用代碼來實現。如圖:
storyboard只支持左右各一個
3、UIBarButtonItem VS UIButton
其實對于這兩個,我沒有深入總結。
UIBarButtonItem繼承圖
UIButton繼承圖
通過這兩個圖,我們知道這兩個家伙沒什么血緣關系,有點像生物界的趨同進化,比如小熊貓和浣熊
小熊貓和浣熊
(例子不太恰當,其實這倆動物區別挺大的……)。
我嘗試過用UIButton當UIBarButtonItem使用(通過storyboard將UIButton拖拽到導航欄上,并寫了響應事件),button倒是能顯示出來,只是點擊沒反應。這倒不出乎意料,如果能當UIBarButtonItem使用,才應該出乎意料,畢竟它們除了長的樣子和交互方式類似,其他并不同。
其實,我們知道UIBarButtonItem是專門給UIToolBar和UINavigationBar定制的類似button的類就好了。將來有更深的體會,我會及時更新。
4、UIToolBar VS UITabBar
這個也沒什么較深的體會,先占個位置……
這里之所以提一句,是因為導航控制器帶有一個toolBar的屬性,在storyboard中,如果你沒有給scene添加navigation item,就往scene上拖拽bar button item,它是不會落到導航欄上,而是落到toolBar上,toolBar默認是隱藏的,但在scene上它是顯示出來的。
接下來,掛羊頭賣狗肉,在這里結合UIToolBar,講一個UIBarButtonItem的用法——為相鄰bar button item添加間隔,通過觀察,這個只在UIToolBar中有效果(在storyboard中使用的話,只能給UIToolBar添加,storyboard的對象庫,也說明這是為UIToolBar準備的)
image
。
沒有添加間隔
添加間隔
效果
代碼用法
5、導航欄一般用法集錦
對于導航欄的操作有兩種方法:
[UINavigationBar appearance]類方法- (BOOL)application:(UIApplication *)application didFinishLaunchingWithOptions:(NSDictionary *)launchOptions { // Override point for customization after application launch. [UINavigationBar appearance].tintColor = [UIColor orangeColor]; [[UINavigationBar appearance] setBackgroundImage:[UIImage imageNamed:@"m_nav64"] forBarMetrics:UIBarMetricsDefault]; return YES;}效果
這顯然是因為UINavigationBar遵從了
self.navigationController.navigationBar 實例方法- (void)viewDidLoad{ self.navigationItem.title = @"劉大帥"; self.navigationController.navigationBar.tintColor = [UIColor orangeColor]; [self.navigationController.navigationBar setBackgroundImage:[UIImage imageNamed:@"m_nav"] forBarMetrics:UIBarMetricsDefault]; self.navigationController.toolbarHidden = NO;}UIAppearance協議的緣故。這個方法在AppDelegate中有效,在特定的視圖控制器中是無效的。它應該是對所有導航欄生效的。效果2
這種用法只對該視圖控制器的導航欄有效果,由于viewDidLoad:在application: didFinishLaunchingWithOptions:之后執行,所以它會覆蓋上一種方法帶來的效果。假設這樣一種場景,用UITabBarController作為最外層視圖控制器容器,每一個tab都有自己的一個導航棧。我們可以用第一種方法做整體效果的設計,用第二種方法作特定tab中的導航欄的設計。
注意:兩個效果之所以有區別,是因為我用了不同的圖片,以示區別。
下面我們以第二種方法為例來介紹導航欄的一般用法
- (void)viewDidLoad{ //默認背景色上傳到簡書不理想,所以換一種背景色 self.view.backgroundColor = [UIColor orangeColor]; //*****************navigationItem********************************* //navigationItem控制導航欄標題(title)、promt、標題視圖(titleView)、以及按鈕(barButtonItem)的添加和數量 self.navigationItem.title = @"劉大帥"; //我表示我不喜歡promt...// self.navigationItem.prompt = @"promt"; //修改導航欄標題為圖片 self.navigationItem.titleView = [[UIImageView alloc]initWithImage:[UIImage imageNamed:@"m_hot60"]]; //添加多個按鈕 UIBarButtonItem* item1 = [[UIBarButtonItem alloc]initWithTitle:@"item1" style:UIBarButtonItemStylePlain target:nil action:nil]; UIBarButtonItem* item2 = [[UIBarButtonItem alloc]initWithTitle:@"item2" style:UIBarButtonItemStylePlain target:nil action:nil]; NSArray* array = @[item1,item2]; self.navigationItem.leftBarButtonItems = array; self.navigationItem.rightBarButtonItems = array; //*****************navigationBar********************************** //navigationBar控制導航欄背景色(barTintColor)、背景圖片(backgroundImage)、按鈕字體顏色(tintColor),標題文本屬性(titleTextAttributes) //調整導航欄背景色 self.navigationController.navigationBar.barTintColor = [UIColor orangeColor]; //半透明開關 self.navigationController.navigationBar.translucent = NO; //為導航欄添加背景圖片,圖片如果是44高,那么不覆蓋狀態欄,如果是64高就會覆蓋狀態欄 //UIBarMetricsDefault 缺省值 UIBarMetricsCompact 橫屏樣式 UIBarMetricsDefaultPrompt和UIBarMetricsCompactPrompt是有promt的兩種樣式 [self.navigationController.navigationBar setBackgroundImage:[UIImage imageNamed:@"m_nav64"] forBarMetrics:UIBarMetricsDefault]; // self.navigationController.navigationBar.tintColor = [UIColor purpleColor]; //定制返回按鈕,這兩個要一起用,為啥這么用,蘋果言語不詳 self.navigationController.navigationBar.backIndicatorImage = [UIImage imageNamed:@"m_ios"]; self.navigationController.navigationBar.backIndicatorTransitionMaskImage = [UIImage imageNamed:@"m_ios"]; //修改導航欄標題的字體 NSShadow *shadow = [[NSShadow alloc] init]; shadow.shadowColor = [UIColor colorWithRed:0.0 green:0.0 blue:0.0 alpha:0.8]; shadow.shadowOffset = CGSizeMake(0, 1); //字典中放入你想修改的鍵值對,原來的UITextAttributeFont、UITextAttributeTextColor、UITextAttributeTextShadowColor、UITextAttributeTextShadowOffset已棄用 self.navigationController.navigationBar.titleTextAttributes = @{NSForegroundColorAttributeName:[UIColor colorWithRed:245.0/255.0 green:245.0/255.0 blue:245.0/255.0 alpha:1.0], NSShadowAttributeName:shadow, NSFontAttributeName:[UIFont fontWithName:@"HelveticaNeue-CondensedBlack" size:21.0] }; //導航欄toolBar隱藏開關 self.navigationController.toolbarHidden = NO;}相關效果圖1
相關效果圖2
新聞熱點


疑難解答