LAMP環(huán)境也web服務器中的一種搭配方案了,在這里我就來為各位介紹一下Apache MySQL5.5.21 PHP5.3.10,希望下文可以給各位帶來幫助.
一:安裝相關依賴組件
先yum安裝基本的依賴組件:
- yum install make apr* autoconf automake gcc gcc-c++ zlib-devel openssl openssl-devel pcre-devel gd kernel keyutils patch perl kernel-headers compat* mpfr cpp glibc libgomp libstdc++-devel ppl cloog-ppl keyutils-libs-devel libcom_err-devel libsepol-devel libselinux-devel krb5-devel zlib-devel libXpm* freetype libjpeg* libpng* php-common php-gd ncurses* libtool* libxml2 libxml2-devel patch --disable-fileinfo
yum安裝過后基本的組件已安好,以下編譯安裝可以安裝最新版的組件.
1:安裝zlib
zlib 官網(wǎng):http://zlib.net
- wget http://zlib.net/zlib-1.2.8.tar.gz
- tar -xvzf zlib-1.2.8.tar.gz
- cd zlib-1.2.7.tar.gz
- ./configure
- make
- make install
2:安裝freetype
- wget http://download.savannah.gnu.org/releases/freetype/freetype-2.5.0.1.tar.gz
- cd /usr/local/src
- tar -zxvf freetype-2.3.5.tar.gz
- cd freetype-2.3.5
- ./configure --prefix=/usr/local/freetype
- make
- make install
make 的時候可能出現(xiàn)錯誤:
- /usr/include/libpng12/pngconf.h:336: error: expected ‘=’, ‘,’, ‘;’, ‘asm’ or ‘__attribute__’ before ‘.’ token
- /usr/include/libpng12/pngconf.h:337: error: expected ‘=’, ‘,’, ‘;’, ‘asm’ or ‘__attribute__’ before ‘include’
- make: *** [/usr/local/src/freetype-2.5.0.1/objs/sfnt.lo] Error 1
解決辦法:
./configure –prefix=/usr/local/freetype –without-png(加上這個選項就行了)
3:安裝libpng
- wget http://sourceforge.net/projects/libpng/files/libpng12/older-releases/1.2.31/libpng-1.2.31.tar.gz/download
- cd /usr/local/src
- tar -zxvf libpng-1.2.31.tar.gz
- cd libpng-1.2.31
- ./configure
- make
- make install
4:安裝libxml2
- wget http://xmlsoft.org/sources/old/libxml2-2.7.1.tar.gz
- cd /usr/local/src
- tar -xzvf libxml2-2.7.1.tar.gz
- cd libxml2-2.7.1
- ./configure --prefix=/usr/local/libxml2 --without-zlib 記得加上后面這句,不然會出錯
- make
- make install
5:安裝libmcypt
- wget ftp://mcrypt.hellug.gr/pub/crypto/mcrypt/libmcrypt/libmcrypt-2.5.7.tar.gz
- cd /usr/local/src
- tar zxvf libmcrypt-2.5.7.tar.gz
- cd libmcrypt-2.5。7
- ./configure --prefix=/usr/local/libmcrypt
- make
- make install
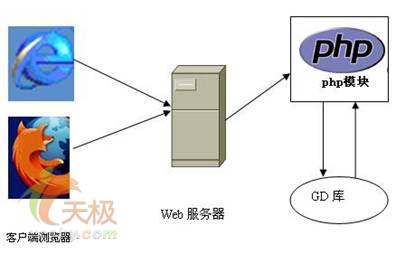
6:安裝gd2(php的gd庫,壓縮和處理圖片會用到).
- wget http://google-desktop-for-linux-mirror.googlecode.com/files/gd-2.0.35.tar.gz
- cd /usr/local/src
- tar -zxvf gd-2.0.35.tar.gz
- mkdir -p /usr/local/gd
- cd gd-2.0.35
- ./configure --prefix=/usr/local/gd --enable-m4_pattern_allow --with-jpeg --with-png --with-zlib --with-freetype=/usr/local/freetype --with-libmcrypt=/usr/local/libmcrypt
- make
- make instal
–with-jpeg:使其支持jpeg圖片處理,–with-png:支持png圖片處理.
編譯過程可能出現(xiàn)錯誤,就先編譯安裝下gettext:
- wget http://ftp.gnu.org/pub/gnu/gettext/gettext-0.18.3.1.tar.gz
- tar xzf gettext-0.17.tar.gz
- cd gettext-0.17
- ./configure
- make
- make install
注意:gd庫版本如果是gd-2.0.35以上,則需要 ./configure –enable-m4_pattern_allow或者編譯安裝 gettext組件后再重新編譯gd
7:安裝apr(Apache可移植運行庫).
在這個地址http://mirror.bit.edu.cn/apache/apr/ 下載apr和apr-util
- cd /usr/local/src
- wget http://mirror.bit.edu.cn/apache/apr/apr-1.5.1.tar.gz
- tar -zxvf apr-1.5.1.tar.gz
- cd apr-1.5.1
- ./configure --prefix=/usr/local/apr
- make
- make install
8:安裝apr-util
- wget http://mirror.bit.edu.cn/apache/apr/apr-util-1.4.1.tar.gz
- tar zxvf apr-util-1.4.1.tar.gz
- cd apr-util-1.4.1
- ./configure --prefix=/usr/local/apr-util --with-apr=/usr/local/apr
- make
- make install
9:安裝openssl
wget ftp://ftp.openssl.org/source/openssl-1.0.1c.tar.gz #openssldir 是配置文件目錄,建議安裝兩次,shared 作用是生成動態(tài)連接庫.
- tar -zxf openssl-1.0.1c.tar.gz
- cd openssl-1.0.1c/
- ./config --prefix=/usr/local/openssl --openssldir=/usr/local/openssl/ssl
- make && make install
- ./config shared --prefix=/usr/local/openssl --openssldir=/usr/local/openssl/ssl
- make clean
- make
- make install
10:安裝curl
- wget http://curl.haxx.se/download/curl-7.17.1.tar.gz
- tar -zxvf curl-7.17.1.tar.gz
- cd curl-7.17.1
- ./configure --prefix=/usr/local/curl
- make
- make install
如果出現(xiàn)錯誤:
- curl.so -lz -lrt -Wl,-rpath -Wl,/usr/local/curl/lib
- ../lib/.libs/libcurl.so: undefined reference to `ERR_remove_thread_state’
- collect2: ld returned 1 exit status
- make[2]: *** [curl] Error 1
- make[2]: Leaving directory `/usr/local/src/curl-7.32.0/src’
- make[1]: *** [all] Error 2
- make[1]: Leaving directory `/usr/local/src/curl-7.32.0/src’
- make: *** [all-recursive] Error 1
建議安裝舊點的版本,特別是如果openssl的版本是1.0以下.
二:安裝httpd
- wget http://mirrors.cnnic.cn/apache//httpd/httpd-2.4.9.tar.gz
- tar -zxvf httpd-2.4.9.tar.gz
- cd httpd-2.4.9
- ./configure --prefix=/usr/local/apache --with-apr=/usr/local/apr --with-included-apr --with-apr-util=/usr/local/apr-util --with-ssl=/usr/local/openssl --enable-ssl=static --enable-so --enable-maintainer-mode --with-mpm=prefork --enable-rewrite=shared --enable-userdir --enable-vhost-alias=shared --enable-cgi --enable-cgid --enable-expires=shared --enable-mem-cache=shared --enable-disk-cache=shared --enable-cache=shared --enable-deflate --enable-modules=all --enable-mods-shared=all
- make //Vevb.com
- make install
- /usr/local/apache/bin/apachectl -k start #啟動httpd
- vim /usr/local/apache/conf/httpd.conf #編輯配置文件
找到:#ServerName www.example.com:80
修改為:ServerName localhost:80
找到:DirectoryIndex index.html
修改為:DirectoryIndex index.html index.php
找到:Options Indexes FollowSymLinks
修改為:Options FollowSymLinks #不顯示目錄結構
找到AllowOverride None
修改為:AllowOverride All #開啟apache支持偽靜態(tài),注意有兩處都做修改.
LoadModule rewrite_module modules/mod_rewrite.so #取消前面的注釋,開啟apache支持偽靜態(tài).
cp /usr/local/apache/bin/apachectl /etc/rc.d/init.d/httpd #加入到系統(tǒng)啟動
vim /etc/init.d/httpd
在#!/bin/sh下面添加以下兩行:
- #chkconfig:2345 10 90
- #description:Activates/Deactivates Apache Web Server
- chown daemon.daemon -R /usr/local/apache/htdocs #更改默認項目目錄所有者
- chmod 700 /usr/local/apache/htdocs -R #更改apache默認網(wǎng)站目錄權限
- chkconfig httpd on #設置開機自動啟動httpd
- /etc/init.d/httpd start #啟動httpd
- service httpd restart #重啟httpd
編譯或者配置時可能會出現(xiàn)以下錯誤.
1:錯誤信息:
- httpd-2.4.4/support/ab.c:2271: undefined reference to `TLSv1_1_client_method’
解決辦法:這個是openssl的版本問題,版本低于1.0建議編譯安裝高版本的1.0.0c,然后編譯安裝apache時候加上–with-ssl=/usr/local/openssl 這個參數(shù),問題解決.
2:錯誤信息:
- /usr/local/ssl/lib/libssl.a: could not read symbols: Bad value
- collect2: ld returned 1 exit status
- make[4]: *** [mod_ssl.la] Error 1
- make[4]: Leaving directory `/usr/local/src/httpd-2.4.9/modules/ssl’
- make[3]: *** [shared-build-recursive] Error 1
- make[3]: Leaving directory `/usr/local/src/httpd-2.4.9/modules/ssl’
- make[2]: *** [shared-build-recursive] Error 1
- make[2]: Leaving directory `/usr/local/src/httpd-2.4.9/modules’
- make[1]: *** [shared-build-recursive] Error 1
- make[1]: Leaving directory `/usr/local/src/httpd-2.4.9′
- make: *** [all-recursive] Error 1
解決辦法:這段錯誤說明ssl方面的錯誤,需要重新編譯.
a:編譯時候沒帶上–with-ssl=/usr/local/openssl
b:帶上了–with-ssl的參數(shù),但是openssl編譯的時候沒有帶上:fPIC這個參數(shù)
- Position Independent Code is necessary for a module like mod_ssl which may get placed anywhere in memory at runtime. It is not necessary for the standalone OpenSSL test program, which is why make test worked OK without -fPIC.
3:錯誤信息:
error while loading shared libraries: libssl.so.1.0.0: cannot open shared object file: No such file or directory
解決辦法:
因為我們加載的模塊是 mod_ssl.so,到openssl目錄的lib下發(fā)現(xiàn)有這兩個庫,如果要讓mod_ssl.so找到這兩個庫必須將ssl/lib添加到 LD_LIBRARY_PATH變量下.
~/.bashrc(每次登錄每次打開shell讀取一次) ,
修改完用戶的環(huán)境變量后不會馬上生效,執(zhí)行 source ~/.bashrc 使其生效,這樣就可以啟動apache了.
4:錯誤信息:
chkconfig httpd on后,利用service httpd start 出現(xiàn)錯誤:error while loading shared libraries: libssl.so.1.0.0: cannot open shared object file: No such file or directory
原因是:啟動時候找不到庫文件libssl.so.1.0.0,因為/usr/lib64(64位的用戶庫文件)沒有這個文件.
解決辦法:
利用ln 軟鏈接去共用 /usr/local/openssl/lib 的庫文件.
- ln -s /usr/local/openssl/lib/libssl.so.1.0.0 /usr/lib64/libssl.so.1.0.0
- ln -s /usr/local/openssl/lib/libcrypto.so.1.0.0 /usr/lib64/libcrypto.so.1.0.0
service httpd start 成功.
5:錯誤信息:
configure時候出現(xiàn)錯誤
configure: error: Bundled APR requested but not found at ./srclib/. Download and unpack the corresponding apr and apr-util packages to ./srclib/.
解決辦法:
因為:apache-2.2與新出的apache-2.4安裝不同的地方在于,2.4版的已經(jīng)不自帶apr庫,所以在安裝apache-2.4之前,需要下載apr.
- cp -rf apr-1.4.4 httpd-2.4.9/srclib/apr
- cp -rf apr-util-1.5.3 httpd-2.4.9/srclib/apr-util
再configure 即可.
三:安裝mysql
mysql官網(wǎng):http://dev.mysql.com/downloads/ 下載源碼包
groupadd mysql #添加mysql組
useradd -g mysql mysql -s /bin/false #創(chuàng)建用戶mysql并加入到mysql組,不允許mysql用戶直接登錄系統(tǒng).
- mkdir -p /usr/local/mysql #創(chuàng)建MySQL安裝目錄
- mkdir -p /usr/local/mysql/data #創(chuàng)建MySQL數(shù)據(jù)存放目錄
- tar zxvf mysql-5.5.21.tar.gz
- cd mysql-5.5.21
- cmake . -DCMAKE_INSTALL_PREFIX=/usr/local/mysql -DMYSQL_DATADIR=/usr/local/mysql/data -DSYSCONFDIR=/etc -DMYSQL_UNIX_ADDR=/tmp/mysql.sock -DWITH_INNOBASE_STORAGE_ENGINE=1 -DWITH_MYISAM_STORAGE_ENGINE=1 -DENABLED_LOCAL_INFILE=1 -DMYSQL_TCP_PORT=3306 -DWITH_EXTRA_CHARSETS:STRING=utf8,gbk -DDEFAULT_CHARSET=utf8 -DDEFAULT_COLLATION=utf8_general_ci -DWITH_DEBUG=0 -DWITH_READLINE=1 -DWITH_SSL=yes
- #(有時候會出現(xiàn)找不到/usr/local/mysql/data 等警告,不管他,直接繼續(xù)編譯)
- make
- make install
- cd /usr/local/mysql
- cp ./support-files/my-huge.cnf /etc/my.cnf #提示文件存在的話直接覆蓋
- vim /etc/my.cnf #在 [mysqld] 部分增加
- datadir =/usr/local/mysql/data #數(shù)據(jù)庫存放路徑
- ./scripts/mysql_install_db --basedir=/usr/local/mysql --datadir=/usr/local/mysql/data --user=mysql #生成mysql系統(tǒng)數(shù)據(jù)庫
- cp ./support-files/mysql.server /etc/rc.d/init.d/mysqld #把Mysql加入系統(tǒng)啟動
- chmod 755 /etc/init.d/mysqld #增加執(zhí)行權限
- chkconfig mysqld on #加入開機啟動
- vim /etc/rc.d/init.d/mysqld #編輯
- basedir = /usr/local/mysql #MySQL程序安裝路徑
- datadir = /usr/lcoal/mysql/data #MySQl數(shù)據(jù)庫存放目錄
- service mysqld start #啟動
- /usr/local/mysql/bin/mysql -u root –p # 登錄mysql
- #安裝成功后進行root用戶密碼修改:
- /usr/local/mysql/bin/mysqladmin -u root -p password "新密碼" #回車后提示輸入舊密碼,輸入成功后密碼修稿成功
- /etc/init.d/mysqld restart #重啟mysql,安裝成功!
四:安裝php
- wget http://cn2.php.net/get/php-5.3.27.tar.gz/from/ar2.php.net/mirror
- ./configure --prefix=/usr/local/php --with-config-file-path=/usr/local/php/etc --with-apxs2=/usr/local/apache/bin/apxs --with-mysql=/usr/local/mysql --with-mysqli=/usr/local/mysql/bin/mysql_config --with-mysql-sock=/tmp/mysql.sock --with-gd --with-iconv --with-freetype-dir=/usr/local/freetype --with-jpeg-dir=/usr/local/jpeg9 --with-png-dir=/usr/local/libpng --with-zlib --with-libxml-dir=/usr/local/libxml2 --enable-xml --enable-discard-path --enable-magic-quotes --enable-safe-mode --enable-bcmath --enable-shmop --enable-sysvsem --enable-inline-optimization --with-curlwrappers --enable-mbregex --enable-fastcgi --enable-force-cgi-redirect --enable-mbstring --enable-ftp --enable-gd-native-ttf --with-openssl --enable-pcntl --enable-sockets --with-xmlrpc --enable-zip --enable-soap --without-pear --with-gettext --with-mime-magic --enable-suhosin --enable-session --with-mcrypt
- make
- make install
–with-jpeg-dir 使用yum安裝的默認版本
configure配置的時候可能出現(xiàn)的問題:
checking for cURL in default path… not found
configure: error: Please reinstall the libcurl distribution -
因為:curl的dev包沒有安裝
解決辦法:yum -y install curl-devel
make編譯的時候可能出現(xiàn)的問題:
virtual memory exhausted: Cannot allocate memory
原因:編譯過程是一個內存消耗較大的動作,內存吃緊,無法分配
解決辦法:配置項加上 –disable-fileinfo這個參數(shù),重新編譯
- cp php.ini-production /usr/local/php/etc/php.ini #復制php配置文件到安裝目錄
- rm -rf /etc/php.ini #刪除系統(tǒng)自帶的配置文件
- ln -s /usr/local/php/etc/php.ini /etc/php.ini #創(chuàng)建配置文件軟鏈接
- vim /usr/local/php/etc/php.ini #編輯
找到:;open_basedir =
修改為:open_basedir = .:/tmp/ #防止php木馬跨站
找到:;date.timezone =
修改為:date.timezone = PRC
找到:expose_php = On
修改為:expose_php = OFF #禁止顯示php版本的信息
找到:display_errors = On
修改為:display_errors = OFF #關閉錯誤提示
wq!#保存 php安裝完成
五:配置apache支持php
- vim /usr/local/apache/conf/httpd.conf #編輯apache配置文件
- 添加下面兩行
- LoadModule php5_module modules/libphp5.so
- AddHandler application/x-httpd-php .php (注意:php .php這個點前面有一個空格)
- service httpd restart #重啟apache
- service mysqld restart #重啟mysql
- cd /usr/local/apache/htdocsvi index.php #輸入下面內容
- :wq! #保存
- [cc lang="php"]
在客戶端瀏覽器輸入服務器IP地址,可以看到php等相關配置信息.
新聞熱點


疑難解答
圖片精選