FFmpeg是一套可以用來記錄、轉換數字音頻、視頻,并能將其轉化為流的開源計算機程序,下面我們來給各位介紹在linux系統中ffmpeg安裝配置步驟,有需要的可以和小編來看看具體步驟如下.
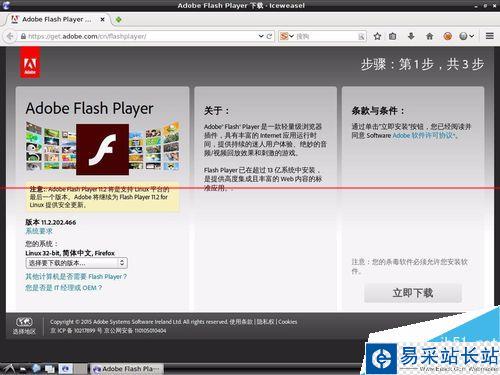
http://ffmpeg.org/download.html
windows版本比較容易.
Linux,安裝環境CentOS,下載tar.bz2安裝包.
- tar -xvf XX.tar.bz2
- yasm/nasm not found or too old. Use –disable-yasm for a crippled build.
- If you think configure made a mistake, make sure you are using the latest
- version from Git. If the latest version fails, report the problem to the
- ffmpeg-user@ffmpeg.org mailing list or IRC #ffmpeg on irc.freenode.net.
- Include the log file “config.log” produced by configure as this will help
- solve the problem.
- http://yasm.tortall.net/Download.html 下載yasm
- tar -zxvf yasm.tar.gz
- ./configure
- make
- make install
再來,ffmpeg下面 ./configure 安裝完畢,發現無法將amr轉成MP3.
- ./ffmpeg -i x.amr x.mp3
- ./configure –enable-libmp3lame
少這個libmp3lame:
- # wget http://downloads.sourceforge.net/lame/lame-3.97.tar.gz
- # tar xzf lame-3.97.tar.gz
- # cd lame-3.97
- # ./configure
- # make
- # make install
- ERROR: libmp3lame >= 3.98.3 not found
- http://downloads.sourceforge.net/lame/去這里找最新的版本,下載一個。
- 我下到的是lame-3.99.5.tar.gz
- # ./configure
- # make
- # make install
- ./ffmpeg -i x.amr x.mp3
- ffmpeg: error while loading shared libraries: libmp3lame.so.0: cannot open shared object file: No such file or directory
- 發生這個我們這樣弄
編輯/etc/ld.so.conf文件加入如下內容:
/usr/local/lib
保存退出后執行ldconfig命令,大功告成,你缺少的庫,可能都在下面了,FFmpeg軟件只是個解碼編碼軟件,如果支持多種格式必須先安裝好對應的庫,下面就說下我裝的庫:
1.安裝faad2
- # wget http://downloads.sourceforge.net/faac/faad2-2.6.1.tar.gz
- # tar xvfz faad2-2.6.1.tar.gz
- # cd faad2
- # ./bootstrap
- # ./configure
- # make
- # make install
2.安裝liba52
- # wget http://liba52.sourceforge.net/files/a52dec-0.7.4.tar.gz
- # tar xvfz a52dec-0.7.4.tar.gz
- # cd a52dec-0.7.4
- # ./configure
- # make
- # make install
3.安裝libdirac
- # wget http://downloads.sourceforge.net/dirac/dirac-0.10.0.tar.gz
- # tar xvfz dirac-0.10.0.tar.gz
- # cd dirac-0.10.0
- # ./configure
- # make
- # make install
4.安裝faac2
- # wget http://downloads.sourceforge.net/faac/faac-1.26.tar.gz
- # tar xvfz faac-1.26.tar.gz
- # cd faac
- # ./bootstrap
- # ./configure
- # make
- # make install
5.安裝libamrnb
- # wget http://ftp.penguin.cz/pub/users/utx/amr/amrnb-7.0.0.2.tar.bz2
- # tar xvfj amrnb-7.0.0.2.tar.bz2
- # cd amrnb-7.0.0.2
- # ./configure
- # make
- # make install
6.安裝libamrwb
- # wget http://ftp.penguin.cz/pub/users/utx/amr/amrwb-7.0.0.3.tar.bz2
- # tar xvfj amrwb-7.0.0.3.tar.bz2
- # cd amrwb-7.0.0.3
- # ./configure
- # make
- # make install
7.安裝libmp3lame
- # wget http://downloads.sourceforge.net/lame/lame-3.97.tar.gz
- # tar xzf lame-3.97.tar.gz
- # cd lame-3.97
- # ./configure
- # make
- # make install
8.安裝libx264
此軟件包需要用git來獲取,所以要先安裝git:
- # wget http://kernel.org/pub/software/scm/git/git-1.6.2.tar.gz (地址要確認)
- # tar zxvf git-1.6.2.tar.gz
- # cd git-1.6.2
- # ./configure
- # make
- # make install
然后安裝libx264.
- # /usr/local/bin/git clone git://git.videolan.org/x264.git x264
- # cd x264
- # ./configure –enable-pthread –enable-shared –disable-asm
- # make
- # make install
8.安裝libnut,該軟件需要用svn獲取源代碼,svn可以直接用yum install svn來裝,先下載:
# svn co svn://svn.mplayerhq.hu/nut/src/trunk libnut
下載后代碼保存在新建立的libnut目錄下,對于64位Linux需要修改配置文件:
- # cd libnut
- # vi config.mak
在最后一個CFLAGS下一行增加:CFLAGS += -fPIC 然后編譯安裝:
- # make
- # make install
9.安裝libogg
- # wget http://downloads.xiph.org/releases/ogg/libogg-1.1.3.tar.gz
- # tar xvf libogg-1.1.3.tar.gz
- # cd libogg-1.1.3
- # ./configure
- # make
- # make install
10.安裝libtheora(svn獲取)
- # svn co http://svn.xiph.org/trunk/theora theora
- # cd theora
- # ./autogen.sh
- # ./configure
- # make
- # make install
11.安裝libvorbis
- # wget http://downloads.xiph.org/releases/vorbis/libvorbis-1.2.0.tar.gz
- # tar xvfz libvorbis-1.2.0.tar.gz
- # cd libvorbis-1.2.0
- # ./configure
- # make
- # make install
12.安裝libxvid
- # wget http://downloads.xvid.org/downloads/xvidcore-1.2.1.tar.gz
- # tar xvf xvidcore-1.2.1.tar.gz
- # cd xvidcore-1.2.1/build/generic
- # ./bootstrap.sh --Vevb.com
- # ./configure –disable-assembly
- # make
- # make install
上面的媒體支持庫安裝完后,可以設置下環境準備編譯FFmpeg了.
13.修改環境變量
# vi /etc/ld.so.conf
在文件末增加一行:/usr/local/lib
然后生效之:# ldconfig
14.安裝FFmpeg
可以通過svn獲取,不過文件比較大,所以特別慢:
- # svn checkout svn://svn.mplayerhq.hu/ffmpeg/trunk ffmpeg
- # cd ffmpeg
- //也可以自己下載:
- # http://www.ffmpeg.org/releases/ffmpeg-0.5.tar.bz2
- # bzip2 -d ffmpeg-0.5.tar.bz2
- # tar -xf ffmpeg-0.5.tar
- # cd ffmpeg-0.5
編譯(64位系統需要設置PKG_CONFIG_PATH參數):
- # export PKG_CONFIG_PATH=/usr/local/lib/pkgconfig CFLAGS=”-fPIC -m64″
- # ./configure –enable-shared /
- –enable-gpl /
- –enable-nonfree /
- –enable-postproc /
- –enable-avfilter /
- –enable-avfilter-lavf /
- –enable-pthreads /
- –enable-libamr-nb /
- –enable-libamr-wb /
- –enable-libdirac /
- –enable-libfaac /
- –enable-libfaad /
- –enable-libfaadbin /
- –enable-libmp3lame /
- –enable-libnut /
- –enable-libtheora /
- –enable-libvorbis /
- –enable-libx264 /
- –enable-libxvid /
- –enable-decoder=libx264 /
- –enable-encoder=libx264
- # make
- # make install
14.可能出現的錯誤:
- /usr/include/linux/videodev.h:56: error: syntax error before “ulong”
- /usr/include/linux/videodev.h:72: error: syntax error before ‘}’ token
- libavdevice/v4l.c: In function `grab_read_header’:
- libavdevice/v4l.c:75: error: storage size of ‘tuner’ isn’t known
- libavdevice/v4l.c:133: error: invalid application of `sizeof’ to incomplete type `video_tuner’
- libavdevice/v4l.c:140: error: invalid application of `sizeof’ to incomplete type `video_tuner’
- libavdevice/v4l.c:75: warning: unused variable `tuner’
這可能是源代碼videodev.h不是針對次版本Linux寫的,標準C沒有ulong類型,所以要改成unsigned long.
15.運行ffmpeg -formats,可能出的錯誤:
- ffmpeg: error while loading shared libraries:libavfilter.so.0: cannot open shared object file: No such file or directory
這事沒有設置環境路徑造成了,增加一個ffmpeg.conf配置文件:
- # cd /etc/ld.so.conf.d
- # vi ffmpeg.conf
- //在文件內寫上:
- /usr/local/lib
- //然后確認生效:
- # ldconfig
新聞熱點


疑難解答